Guide to Foundation Paper Piecing
The Beauty of a New York Beauty block is that it is quite easy to get beautiful perfect results courtesy Foundation Paper Piecing (FPP). FPP ensures we make perfect points, get perfect sized blocks, make complex patterns, all of it and more. However, here are a few tips to ensure we avoid problems/minimize having to whip out Jack the Ripper !
The curved piecing takes some getting used to - do it once, do it again, and again and soon you’ll be saying “been there, done that, piece of cake ”!
Let’s get to it then …
Check your Print settings
set the Scale to 100%.
Check if your scale is right. The side of E1 should measure 6 7/8”
Remember that the templates are mirrored.
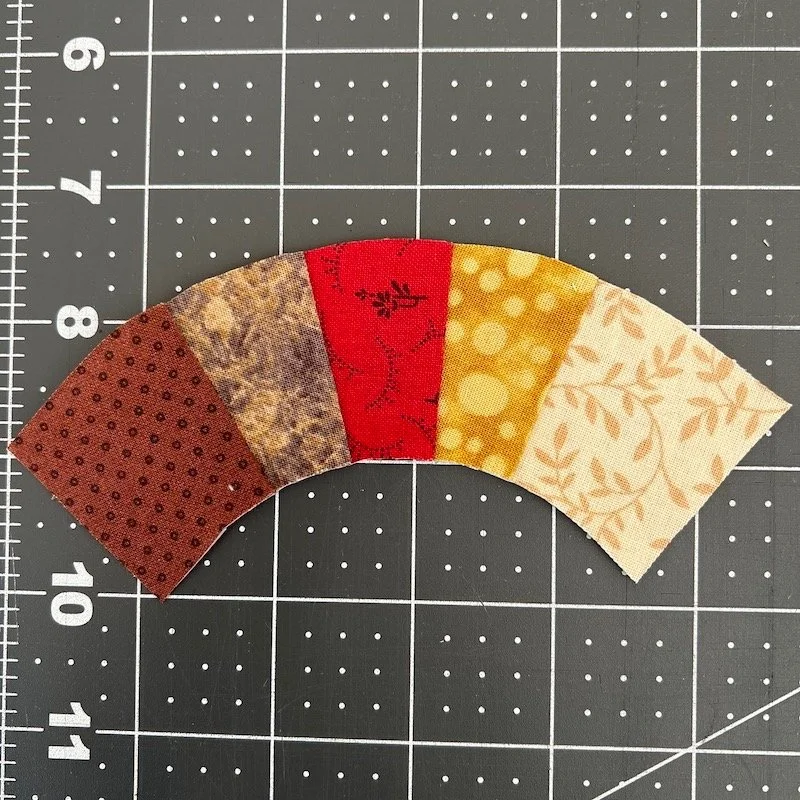
What I got was this …
What I wanted was this !
The order of fabrics I used was wrong ! So, make sure to arrange your fabrics in the reverse order in which you want them to appear. In this case, the polka dotted brown to beige would be the right sewing order,
Place your rotary cut arcs also on the reverse side and cut.
Cut your pieces bigger
Cut Pattern Templates bigger - once sewn, they can be trimmed to size.
Rotary cutting templates are also cut bigger. Makes it easier to run your blade along the dotted line cutting both paper and fabric together, rather than along the perfectly cut line of the template. Else you may end up cutting into your seam allowance.
Make room for creative piecing
I’m not a very accurate piecer. The perfect 1/4” seam (let alone the scant 1/4” seam) constantly eludes me. As a result of which, I much prefer art quilting, improv quilting, modern quilting, etc to traditional quilting. But, I love to do this too ! My workaround, is to build in some ease for me to be able to trim the blocks.
I cut all my pattern pieces slightly larger on the sides - about 1/4” extra on either side as you can see in the first photo. Be sure to mark the edges and the midpoint of each curve before you start piecing else you’ll end up with ruffles ! Once my block is pieced, here’s what I do…
The finished block - see how wonky it is !
TaDa ! A Perfect trimmed block !
See where the extra fabric helps ! No way I could’ve done that if I had cut my pieces right to size.
Working from strips of fabric
Typically, FPP leads to a lot of fabric wastage. Let’s see if we can minimise that. .
Sewing direction is always from the smaller curve to the larger curve
For starters, place the fabrics one on top of the other with the tails in opposite directions. The first is always away from you. The second is towards you.
Trim the leftovers with some extra on the edges.
Place the fabric with the tail facing you when you are sewing to the left of the point.
Place the fabric with the tail facing away from you when you are sewing to the right of the point
After every line you sew, lift up the paper and trim the extra fabric. You can use an Add-a-Quarter ruler, or your normal ruler and rotary cut, but I prefer scissors. Much handier and saves a trip to the cutting station (which will be in another room since I don’t have a studio ! )
Finger press every seam, leaving no fabric in the seams. Your points will not be sharp and will shorten if extra fabric remains in the seams
Aaaannnd ….this is all that’s left over !
Curved Piecing
As intimidating as it seems, it really isn’t. It takes a bit of practice, and can be frustrating when we don’t get it right. But the key is to not force the two fabrics together. Gently coax them together. Manipulate the fabric. Don’t get disheartened when you see your fabric isn’t lying flat. A good ironing fixes a lot of problems !
If you have cut your pieces larger at the sides, like I do, remember to mark the exact measurements in the seam allowance and match them in order to avoid ruffles.
Remove the paper before you try to attach an FPP pattern to another piece. This will allow you to manipulate the fabric better.
When trying to join points from two different pieces, pinning at each intersecting point helps.
When joining two curves together, remember, the larger curve is always on top. Pin the sides at the marks that you have already made, and at the centre and manipulate the fabric while sewing.
Before trimming, cut the seam allowance from the background curve paper template. Pin it onto the block making sure the midpoint and the curves match . Now you know exactly where to trim your block.
A few more things to remember :
Use a small stitch length to help tear the paper easily.
Lock your seams at the beginning and end of every seam in the seam allowance
Maintain a scant 1/4” seam to avoid cutting off points.
Reuse one side printed paper to avoid wasting good paper - that’s what I’m using too !
Any more tips and tricks you can share, please comment below !


